Boat ownership comes with plenty of rewards, but it also means dealing with the occasional scratch, chip, crack or gouge in your vessel's finish.
Whether you have accidentally scraped against a pontoon, dropped equipment onto the deck, or discovered damage after a busy season on the water, maintaining your boat's gel coat is an important part of protecting its appearance and structural integrity.
Fortunately, many minor repairs can be sorted at home using a gel coat repair kit. These repair kits are designed specifically for fixing cosmetic damage to fibreglass boats and can help restore your vessel without the cost of professional repairs. With the right preparation for the job, materials and attention to detail, it's possible to achieve impressive results.
What Is a Gel Coat Repair Kit?
A gel coat repair kit contains the items needed to repair damage to the outer gel coat layer found on many fibreglass boats. Gel coat acts as a protective barrier over the fibreglass structure beneath, helping to prevent water ingress while providing a smooth, attractive finish.
Most repair kits include gel coat resin, catalyst, mixing cups, application sticks, sandpaper, polishing compound and instructions. Some kits also include colour-matching pigments to help achieve a near-perfect repair. Depending on the brand, the kit may be suitable for repairing scratches, chips, cracks, air bubbles, holes and other minor damage.
A quality gel coat repair kit is often the best option for DIY boat owners who want to carry out routine maintenance and keep their vessel looking its best.
Understanding the Damage Before You Begin
Before reaching for your repair kit, it's important to assess the damage carefully. Surface scratches that only affect the topcoat are generally more straightforward to repair. Deeper gouges, chips and cracks may require additional filling and preparation before the gelcoat can be applied.
Examine the affected area and determine whether the damage extends through the gel coat and into the fibreglass beneath. If the fibreglass itself has been compromised, a more extensive GRP repair may be required using resin and reinforcement materials before applying a new gelcoat.
Small chips and scratches are proven to be the best candidates for DIY repairs, while larger holes or structural damage may be better handled by a professional.
Preparing the Surface
Preparation is the most important stage of the gelcoat repair process. Even the highest quality repair kit you can get in stores will struggle to deliver good results if the surface is not properly prepared.
Start by cleaning the damaged area thoroughly. Remove dirt, salt, wax, polish and any other contaminants that could affect adhesion. Acetone is commonly used as a solvent for this stage because it evaporates quickly and leaves a clean surface.
Once cleaned, lightly sand around the damaged area using dry paper. This creates a key for the new gelcoat and helps blend the repair into the surrounding finish. Any loose material should be removed completely.
For deeper cracks, chips or gouges, you may need to widen the damaged section slightly using a small tool. While this may seem strange, it helps ensure the repair material bonds effectively and prevents future failure.
The surface should be completely dry before moving to the next stage. Any trapped moisture can affect curing and compromise the finish.
Colour Matching Your Gelcoat
One of the biggest challenges of gelcoat repair is achieving an accurate colour match. Boats naturally fade over time due to exposure to sunlight, meaning the original colour may not perfectly match the current finish.
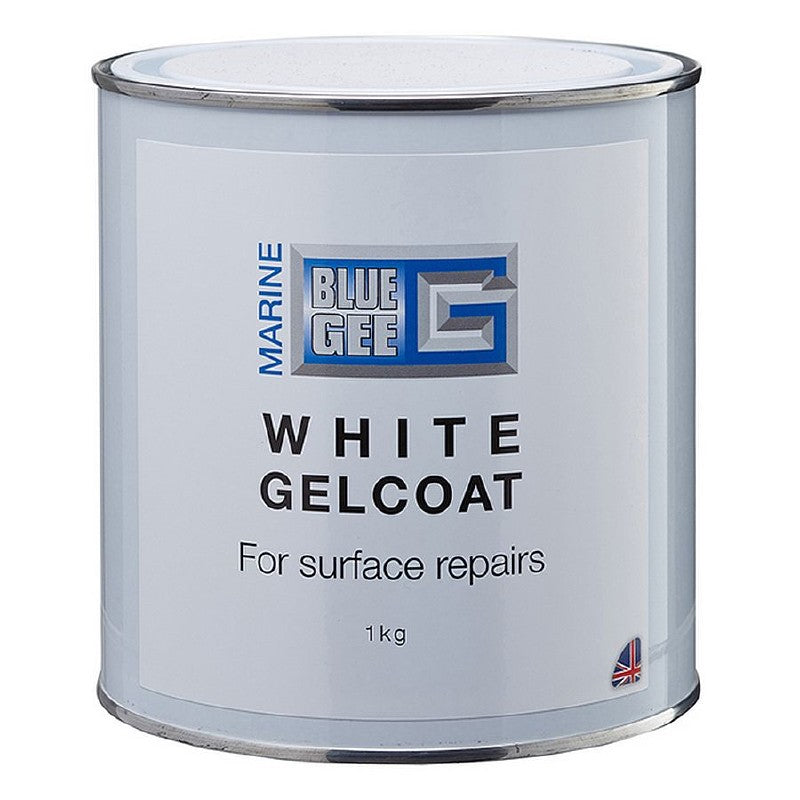
Many repair kits include white gelcoat, which is suitable for a large number of boats. However, shades can vary considerably, with some appearing bright white, for example, while others have cream, yellow or off-white tones. Clear gelcoat kits are also available.
Colour-matching pigments can be mixed into the gelcoat to create a closer match. It's often worth testing small amounts on a piece of cardboard or wood before applying the mixture to the boat itself.
Taking time during this stage can make a significant difference to the final appearance. Even a well-executed repair can stand out if the colour is different from the surrounding surface.
Mixing the Gelcoat
Once the surface is prepared and you've achieved a suitable colour match, it's time to mix the gelcoat.
Most products require the addition of a catalyst to initiate the curing process. The manufacturer's instructions should always be followed carefully, as too much catalyst can cause rapid curing, while too little may prevent the repair from hardening properly.
Typically, the gelcoat and catalyst are mixed in small cups supplied within the kit. Application sticks are then used to combine the materials thoroughly. Only mix the amount required for the immediate repair. Once combined, the working time can be limited, particularly during warmer weather.
Applying the Repair
The method of application depends on the type of damage being repaired. For scratches and small chips, the mixed gelcoat can be applied directly using the supplied sticks or a small brush. The material should be worked carefully into the damaged area to eliminate air bubbles and ensure complete coverage.
When repairing deeper gouges or holes, the gelcoat may need to be applied in numerous stages. Overfilling slightly is often recommended because the material will shrink marginally during curing and can later be sanded flat.
Take care not to spread the gelcoat unnecessarily onto surrounding surfaces. Precision at this stage will reduce the amount of finishing work required later.
Some repairs may benefit from being covered while curing. Depending on the product, a protective film or wax additive may be used to prevent air from affecting the curing process.
Allowing the Gelcoat to Cure
Patience is essential during this stage. The curing speed will depend on temperature, humidity and the specific formulation being used.
Most gelcoat repairs become touch-dry within several hours, but complete curing often takes longer. The manufacturer's guidance should always be followed. You also want to avoid exposing the repair to water until it has fully cured. Early contact with moisture can affect the finish and reduce durability. Once cured, the repaired area should feel hard and stable, with no signs of tackiness.
Sanding and Finishing
After curing, the repair can be levelled and blended into the surrounding surface. Begin with wet and dry paper, gradually working through finer grades. Wet sanding helps reduce heat build-up and produces a smoother finish. The end goal is to create a flat surface that transitions seamlessly into the surrounding gelcoat.
Care should be taken not to sand too aggressively, as removing too much material can expose the repair and require additional filling. Once the repair is level, a polishing compound can be applied. This helps restore the gloss and removes any remaining sanding marks. A quality polish will often bring the repaired area very close to the appearance of the original finish. The final results will largely depend on the care taken during preparation, colour matching and finishing.
Common Mistakes to Avoid
Many DIY repairs fail not because of the product itself, but because of poor preparation or rushed application. Applying gelcoat to a dirty surface is one of the most common mistakes. Contamination can prevent proper adhesion and lead to failure. Likewise, incorrect catalyst ratios can affect curing and leave the repair either brittle or soft.
Colour matching is another area where attention is required. Rushing this stage often results in visible repairs that affect the boat's appearance.
Air bubbles should also be avoided wherever possible. These can weaken the repair and create imperfections in the finish.
Finally, many boat owners underestimate the importance of sanding and polishing. These finishing stages often determine whether the repair looks professional or obviously patched.
When to Consider Professional Repairs
While a gel coat repair kit can successfully mend many forms of cosmetic damage, there are situations where professional assistance may be the better option.
Extensive cracking, structural fibreglass damage, large holes or widespread osmosis issues often require specialist knowledge and equipment. In these cases, a professional repair can help ensure the long-term integrity of the boat.
However, for the majority of everyday chips, scratches and minor gouges, modern repair kits provide an effective and cost-efficient solution.
Maintaining Your Boat After Repairs
Once repairs have been completed, ongoing maintenance can help protect both the repaired area and the wider gelcoat surface.
Regular washing removes salt and debris that can accelerate wear. Periodic polishing helps maintain shine and provides additional protection against UV exposure. Applying a suitable marine wax can also help preserve the finish and reduce future damage.
Inspecting your boat regularly allows small issues to be addressed before they develop into larger repairs. A small chip repaired quickly is usually far easier and less expensive than dealing with more significant damage later.
Find the Right Gel Coat Repair Kit at Seamark Nunn
Choosing the right gel coat repair kit is the first step towards achieving professional-looking repairs at home. Whether you're dealing with minor scratches, chips, cracks or small holes, using quality materials can make the process significantly easier and improve the final finish.
At Seamark Nunn, we stock a wide range of marine maintenance products, repair kits and boat care essentials from trusted brands.
Our experienced team understands the challenges faced by boat owners and can help you find the most suitable gelcoat repair products for your vessel. With competitive pricing, reliable delivery and extensive marine expertise, Seamark Nunn is the ideal place to purchase everything you need to keep your boat looking its best throughout the season.
If you have any questions before adding to your basket, contact us today.